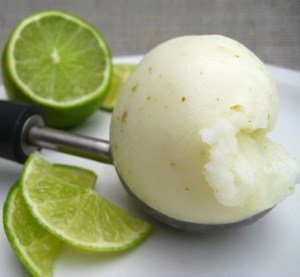
Anzac Cake

IMG_4803

I found this recipe online this week & thought it looked delicious.  The recipe wasn’t in Thermomix format & of course called for the use of a saucepan, electric beaters & a sieve.  I thought I’d make it & convert the recipe to TM method at the same time.  Well, the cake was delicious!  I’ll definitely be making this one again.  It was a hit with the whole family, nut free for lunch boxes & lovely even without the icing.  However, the icing is divine!  I love to bake & decorate cakes, so in this post I’ve included some great tips for presenting & freezing the perfect cake.

Cake Ingredients:

170g Golden Syrup

125g Butter

300g SR flour

110g Caster sugar

40g shredded or desiccated coconut

2 eggs

250g Full cream milk

Icing Ingredients:

60g Butter

5 g Honey

5g Vanilla extract

210g Raw sugar or icing sugar

20g hot water

Extra coconut to decorate

Cake Method:

1) Preheat oven to 180 degrees.

2) Place butter & syrup in TM bowl & melt 4 minutes/70 degrees/speed 2.  Check that butter is melted & heat for another minute if required.

3) Add flour, sugar, coconut & eggs to TM bowl.  Mix 10 seconds/speed 4.

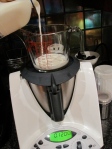
4) Place an empty jug on top of the TM lid & zero scales.  Weigh 250g milk.

IMG_4836

5) Keep mixing the mixture on speed 4 & gradually pour the milk into the TM bowl, through the hole in the lid.  Take about 1 minute to pour the milk in.

6) Scrape down the side of the bowl & mix 10 seconds/speed 4.

7) Pour mixture into a greased & lined cake tin & bake at 180 degrees for approximately 60 minutes.

Allow the cake to cool in the tin.  The majority of the cakes you will bake will end up with a raised & crunchy peak in the middle.  This is due to the middle of the cake being the last point to cook.  This used to drive me crazy & I always wondered how other cakes looked so even.  Cut off the top of the cake (as shown below) in an even line & then the top of the cake becomes the bottom of the cake.

IMG_4799IMG_4800

Icing Method:

1) Place raw sugar in the TM bowl & mill for 20 seconds/speed 9.  set aside.  If using icing sugar, this step is not necessary.

2) Place butter, honey, hot water & vanilla in TM bowl.  Mix for 15 seconds/speed 5, until creamy.

3) Add sugar, mix for 10 seconds/speed 5.  Scrape down the sides of the bowl & mix again 10 seconds/speed5.

4) Ice the cake & sprinkle extra coconut.

IMG_4803

Source: Cooking for the Gang (blog)

Tips:

There is no need to sift flours or icing sugar when making this cake in the TM.  It’s the powerful, yet gentle blades that allow this.

One of the best pieces of advice I ever received regarding baking, was to invest in an oven thermometer.  These can be purchased from stores like House & Matchbox & cost around $10-15.  To bake successful cakes, it’s imperative to know what temperature your oven is.  The oven in my house is quite accurate, however, in our last house the oven was always 20 degrees lower than what I set it to.  So, if I wanted to bake a cake at 160 degrees, I would have to set the oven to 180 degrees.  As you can see, my thermometer has had a lot of use.  I just leave it in my oven to keep an eye on the temperature from time to time.

IMG_4838

My Mum has taught me that you can freeze anything, and following that advice, I’ve developed a dislike for wasting food.  Food wastage can end up costing you a fortune if you add everything up over a year.  My freezer is full of things like cake, cheese, cooked meats, stews, tarts, pasta sauces.  The list is endless…..

I love to freeze cakes!  Although I love to bake them, I don’t like having too many temptations for myself in the cupboard.  Frozen cakes are fantastic for when we have visitors.  I can pull something out a few hours before they arrive & allow about 2 hours for it to come to room temperature.  Your friends will never know it was frozen.  You’ll also save time, by not having to make something at the last minute & save money by not having to go to the shops.

I’ve frozen a large portion of the Anzac cake.  If you place it in your freezer for 4-5 hours uncovered, the icing will freeze perfectly.  Once the icing has frozen, you can wrap in up in glad wrap & when you unwrap it, the cake will look like it’s just been iced!

IMG_4805

IMG_4806

Chicken Nuggets

Chicken Nuggets

Ingredients:

500g chicken mince

1 small onion, peeled & quartered

1 carrot, roughly chopped

1/2 zucchini, roughly chopped

1 handful parsley

40g plain flour

1 tbsp vegetable stock concentrate

seasoned breadcrumbs

olive oil

Method:

1) Place onion, carrot, zucchini, parsley & salt into TM bowl. Chop 10 seconds/speed 8.  

2) Add chicken, stock  & flour. Chop 20 seconds/speed 8.

3) Take spoon sized amounts of mixture, roll into balls & flatten slightly into a nugget shape.  Coat nuggets in seasoned breadcrumbs.  Place in the fridge for at least 30 minutes.

IMG_4697

4) Heat oil in a non stick fry pan.  Cook nuggets on a low-medium heat (about 4 minutes each side) until golden brown.

IMG_4698

I don’t mind serving these with some sauce & fries because I know there are veggies in there too!

Chicken Nuggets

Notes:

I don’t use much oil, but the nuggets come out nice & crispy.  You can even use Cornflakes crumbs instead of breadcrumbs, to add extra crunch.

This recipe make quite a lot of nuggets, so I freeze mine.  They’re still crispy even when re-heated in the microwave.

Freezing the nuggets under layers of baking paper mean they don’t stick together & get icy.

IMG_4700

Once frozen, store nuggets in a zip lock bag to save space in your freezer.

IMG_4701

Shredded Chicken

IMG_4384

Steaming chicken breasts in the Varoma is so easy & so is shredding the cooked chicken in your TM bowl. I always have shredded chicken in my freezer, frozen in 100g portions, that I defrost for adding to salads, wraps & sandwiches.

Before Thermomix, I worked for Peter Rowland Catering. PR is famous for his chicken sandwiches. I made some for a party a few years ago (of course they were a massive hit), but I poached the chicken for 30 minutes, plunged the breasts into cold water & then finely chopped the chicken. I then used a generous about of a ridiculously expensive mayonnaise & finally made my sandwiches. If only I had known back then, how do it my Thermomix!

Method:

1) Line Varoma tray with a sheet of baking paper.  This is not essential, however, doing this makes cleaning your Varoma a breeze.

2) Cut chicken breasts lengthwise into 4 strips & place on Varoma tray.

IMG_1071

3) Place 1000g boiling water in TM bowl & place lid & Varoma into position.

4) Cook for 15 minutes/Varoma temperature/speed 3.  Check to see chicken is cooked (may require a few more minutes cooking for larger quantities).

5) Remove chicken & cut strips in half.

6) Empty water from TM bowl (no need to wash) & place chicken in the bowl.

7) Mix 5 seconds/reverse/speed 3-4.  Repeat until desired consistency is achieved.

Tips for the perfect chicken sandwich:

Use home made mayonnaise made in your TM.  It will take 6 minutes to make!

Add some crunch – add chopped celery or pinenuts  to the chicken/mayo mixture.  You can even add a very light curry with mango!

Coconut Pine Lime Sorbet

Pine Lime sorbet

It’s the weather for delicious sorbets & this one is absolutely delicious.  So refreshing, creamy & tropical.   Add some rum & you’ll have a Pina Colada Sorbet!

Ingredients:

80g raw sugar

zest of 2 limes

350g ice cubes

450g coconut cream, frozen in ice cube trays

2 limes (skin removed)

300g frozen pineapple pieces

5g vanilla bean paste

1 egg white

Method:

1) Place sugar & zest into TM bowl & grind 30 seconds/speed 9.

2) Add ice cubes & grind 10 seconds/speed 9.

3) Add frozen coconut cream cubes & grind for 10 seconds/speed 9.

4) Add frozen pineapple pieces, limes, vanilla & egg white.  Mix for 30-60 seconds/speed 9, or until sorbet is creamy.  Use the TM spatula to mix the sorbet as needed, by putting it through the hole in the lid.

IMG_4767

Source: Quirky Cooking

Notes:

You can use a whole vanilla bean instead of paste.  Grind with the sugar & zest in step 1.

Spaghetti Carbonara

spaghetti-carbonara-su-1598630-l

Need a quick meal for the family or just feeding the kids? This Carbonara is very tasty & best yet, it has no cream, so don’t feel too guilty about enjoying this classic dish!

Ingredients:

90g parmesan cheese, cubed

1-2 shallots

150g bacon, cubed

20g olive oil

3 eggs

1 egg yolk

1200 g boiling water

350g spaghetti

Method:

1) Place parmesan in TM bowl, grate for 10 seconds/speed 9.   Set aside.

2) Place shallots in TM bowl & chop 3 seconds/speed 6.

3) Add bacon & oil, cook for 5 minutes/Varoma temperature/speed 1.   Transfer to a large bowl or Thermoserver & set aside.

4) Place eggs, egg yolk & 3/4 of the grated cheese in TM bowl.  Season with salt & pepper & mix 15 seconds/speed 4.   Add egg mixture to the bowl with the bacon. No need to clean TM bowl.

5) Add boiling water & 1/2 teaspoon salt to TM bowl.   Place spaghetti through the hole in the lid.   Cook for time indicated on pasta package/100 degrees/reverse/speed 1.

Spaghetti in lid

6) Drain Spaghetti & add to the bacon – egg mixture & toss to combine.   Season to taste, top with left over parmesan & serve.

Healthy ‘Roast’ Chicken

IMG_4741

This is a Thermomix version of a Roast Chicken. Steaming the chicken in the Varoma means it has a much less fat content than a roasted chicken.   This dish is very tasty, the flavour from the lemon & herbs really comes through the meat, which is lovely & tender. The paprika salt rubs adds flavour & gives the chicken a ‘roasted’ look.   After the chicken is cooked, keep the liquid in the TM bowl, as it’s now chicken stock!  Refrigerate overnight, so you can scrape the fat off the next day.  Use to make soups etc. or freeze to use at a later date.

Ingredients:

1 lemon, peeled & remove pith (reserve zest)

1 whole medium sized chicken (approx 1.2-1.3kg)

2 cloves garlic

2 sprigs rosemary

4 sprigs parsley

5g ground paprika

20g sea salt

5 small new potatoes, skin on

2 carrots, cut into chunks

1/2 head brocoli, cut into florets

Green beans

Method:

1) Wash cavity of chicken & fill with whole peeled lemon, garlic & rosemary.  Place into the Varoma dish.

2) Place reserved lemon zest & parsley in TM bowl, chop for 8 seconds/speed 7. scrape down sides of the bowl.

3) Add paprika & salt, mix for 5 seconds/speed 3.  Rub mixture over chicken.

IMG_4737

4) Add 1.8 litres hot water to TM bowl (no need to wash bowl).  Set Varoma into position & cook for 55 minutes/Varoma temperature/speed 1.

5) Add potatoes & carrots, placing them around the chicken & cook for 15 minutes/Varoma temperature/speed 1.

6) Add broccoli & beans & cook for 8 minutes/Varoma temperature/speed 1.

IMG_4739

7) Season chicken & vegetables & serve.

Source: Devil of a Cookbook 

Notes:

Substitute any vegetables, just add harder vegetables first so they cook longer.

IMG_4744

This is the chicken stock made while the chicken was cooking. 

Gluten Free Pizza Base

IMG_4733

This recipe is from Quirky Jo at Quirky Cooking. If you’re intolerant or allergic to anything, it’s really worthwhile checking out her blog. She makes a lot of recipes that are gluten & dairy free. She’s a bit of a rock star in the Thermomix world!

I’m doing a demo this week & the host requested a gluten free pizza. I hadn’t made one before & upon research, found Quirky Jo’s recipe to have many positive comments. Here is the recipe & the base I made.  Makes 4 thin bases.

Ingredients:
20g chia seeds
20g warm water
120g basmati rice, raw
120g brown rice, raw
80g millet, raw,
40g dry chickpeas
140g arrowroot flour
40g mixed seeds (linseeds, pepitas, sunflower seeds)
1 sachet dry yeast (or 2 tsp dry yeast)
2 tsp salt
380g warm water
20g apple cider vinegar
60g olive oil

Method:

1) Pre heat oven to 220 degrees

2) Mix chia seeds in 20g warm water & leave to soak for a few minutes.

3) Place rice, millet & chickpeas in TM bowl & mill for 1 minute/speed 9

IMG_4727

4) Add arrowroot flour, mixed seeds, dry yeast & salt.  Mix 10 seconds/speed 6

5) Add 380g warm water, vinegar, oil & soaked chia seeds.  Mix for 15 seconds/speed 6.

6) Divide mixture between 4 pizza trays lined with baking paper.  The mixture is like a batter & needs to be spread into shape with a spatula.

IMG_4730

7) Par bake pizza base for 10 minutes, until the top has formed a crust.  Spread pizza toppings over pizza & bake for a further 15 minutes (25 minutes in total).

IMG_4735

Notes:


This batter doesn’t freeze well, like regular pizza dough.  If you don’t want all the bases, bake the rest & freeze.  I’ve frozen mine to have with soups.

Cranberry Chicken Salad

chicken-salad-with-tarragon-520

This summer salad can be served so many ways – with some baby spinach & salad greens or pita bread as a main meal or as a filling for sandwiches & wraps.  Toss through some cooked quinoa, or replace the mayonnaise with natural yoghurt for a low calorie option.  I’ve frozen this in portions, so can add to a salad or wrap anytime for a quick lunch.

Ingredients:
500-600g chicken breasts, diced
1L boiling water
3 spring onions
1 celery stick
1 granny smith apple, quartered
80g dried cranberries
60g green seedless grapes (when in season)
130g toasted almonds
1 tsp curry powder
3 tbsp TM mayonnaise
salt & pepper to taste

Method:

1) Line Varoma tray with baking paper & place diced chicken on tray.  Add boiling water to TM bowl, set Varoma into place & cook for 15 minutes/Varoma temperature/speed 3.  Check the chicken is cooked & cook for a more minutes if required.

2) Set chicken aside to cool slightly.  Chicken can be cooked ahead of time & placed in the fridge.  Clean & dry TM bowl.

3) Place all ingredients, except chicken, in the TM bowl & chop for 4 seconds/speed 4.

4) Add cooked chicken & mix for 5 seconds/reverse/speed 3.

Notes:

Salad can be pre made & refrigerated up to 24 hours before serving.

Lining the varoma tray with baking paper when cooking chicken, means there is hardly anything to wash up!

Source: TM Meat on the Menu

Sesame Lemon Chicken with Hokkien Noodles

IMG_4361

This dish has lovely Asian flavours & is delicious.  Best of all, the meal takes less than 15 minutes to cook, after a little prep time slicing vegetables & chicken.

Ingredients:
2 chicken breasts, thinly sliced
220g packet Hokkien Noodles
2-3 cups seasonal vegetables (eg; broccolini, snow peas, carrots, baby corn, capsicum)
2-3cm piece of ginger
30g soy sauce
20g vegetable oil
30g mirin
40g oyster sauce
10g peanut or sesame oil
15g sugar
juice & zest of 1 lemon
2 tbsp sesame seeds
3 spring onions, thinly sliced

Method:
1) Soak Hokkien Noodles in boiling water for 10 minutes until separated.

2) Place ginger in TM bowl & chop 2 seconds/speed 7

3) Scrape down the sides of the bowl.   Add oils, mirin, oyster sauce, sugar, lemon juice & zest to TM bowl. Cook for 3 minutes/Varoma temperature/speed 1

4) Add sliced chicken to TM bowl.  Place vegetables in Varoma dish & place into position on TM lid. Cook for 10 minutes/Varoma temperature/reverse/speed 1.

5) Drain Noodles & place in thermo server.  Add Chicken & vegetables to thermo server & toss through noodles.  Serve topped with sliced spring onions & sesame seeds.

serves 4 (add another packet of noodles for bigger eaters)

Source: TM Recipe Community