Monkey Bread


Monkey Bread6

If you love Hot Cross Buns, Monkey Bread is an addition to your Easter feasts that you’re sure to love!  Served warm, in the middle of the table, you’ll be able to pinch off balls of sweet, soft pastry that have been rolled in butter & cinnamon sugar!  Baked in a Bundt tin, it will be a centrepiece on your table that is sure to get your friends & family talking.

You can mix this up a bit too – add some cinnamon & mixed spice to the dough in step 1.  You could also add some sultanas or currants to the dough, so it’s more like a hot cross bun (see notes).  For a dairy free option, you can substitute the butter for coconut cream.   If you prefer a healthier Monkey Bread, check out Quirky Cooking for her Spelt Hot Cross Bun Monkey Bread.

The sweet dough in this recipe is a basic sweet bun recipe, that you can use to make things such as sweet scrolls, finger buns, add fillings or cover with icing or sugar glaze.

Sweet Dough Ingredients:
275g lukewarm water
2 sachets dried yeast (or 5 tsp dried yeast)
550g bakers flour
1 tsp salt
2 tsp milk powder (optional)
65g brown sugar
45g soft butter

Ingredients for Monkey Bread assembly:
150g butter
100g raw sugar
2 tsp ground cinnamon
1 tsp mixed spice (optional)

Method:
1) Add all dough ingredients into your TM bowl, in the order listed in the recipe. Mix 40 seconds/speed 3.
2) Knead 8 minutes/dough setting. (it’s best to stay in your kitchen when using the dough setting, to keep an eye on your machine)
3) Transfer dough to a ThermoMat, wrap & let it rest/prove for 30 minutes in a warm spot, or until doubled in size.
4) Once proved, place the dough on your Thermomat or floured surface & knock back the dough with your hands.
5) To assemble the Monkey Bread, place 150g butter in TM bowl, melt 3 minutes/65 degrees/speed 2. Set aside in a small bowl. In a separate bowl, place sugar & spices & mix together.
6) Grease your Bundt tin well, with butter or non stick spray.
7) Pinch off walnut sized pieces of dough & roll into balls.  Roll the balls in melted butter, then in the cinnamon sugar mixture.  Place balls in your tin, making sure you keep the level of balls even around the tin.  Drizzle over any remaining butter.
8) Cover with a clean tea towel & allow to prove in a warm place for 30 minutes.
9) Place tin into a cold oven & turn on to 180 degrees.  Bake for 25-30 minutes.
10) Allow to cool in the tin for 5-10 minutes, then serve warm.

 Notes:

If you add sultanas or dried fruit to your dough, add them for the last minute of kneading (step 2).

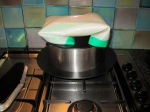
 If you’re having trouble finding a warm place to prove your dough, pour boiling water into your ThermoServer & place your dough on top.  The heat that comes trough the lid will be enough to prove your dough.
IMG_4659
When you roll the dough balls in butter & sugar, keep them at an even level around the tin, as the top of this tin will become the base of your Monkey Bread. 

Monkey Bread1

This has been proved for a further 30 minutes (I just sit the tin on top of my ThermoServer full of boiling water).  Look how much it’s risen!

Monkey Bread2

The Monkey Bread has just come out of the oven & smells amazing!  Allow to cool for 5-10 minutes & then turn out onto a platter & serve.  This is definitely best eaten warm, as the dough is so light & fluffy, however, my kids have enjoyed a few balls of this everyday for the last few days.  It’s great as a treat or snack – even a few balls in the lunchbox. 

Monkey Bread3

Monkey Bread7

If you don’t have a ThermoMat, use a stainless steel bowl greased with olive oil & cover with glad wrap instead. 

Freezing & Defrosting Pizza Dough

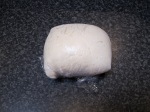
The pizza dough recipe in your basic or everyday cookbook makes 4 pizza bases. After the dough has been proved, you can freeze the dough if you’re not using the whole amount. I freeze my dough in portions, wrapped in glad wrap.

IMG_4367

If you want to make frozen dough into a pizza, allow a few hours for it to defrost & come to room temperature. I’ll usually put mine out in the morning or at lunchtime. Unwrap the frozen dough & put on a plate. Place fresh glad wrap over the frozen dough, making sure that it’s airtight.

IMG_4369

Now just allow your dough to slowly defrost. As it comes to room temperature, it will prove again, doubling in size, which is why you place fresh glad wrap over it.   Depending on how warm your kitchen is, your dough size could increase more or less.  The dough will be quite sticky, so it’s good to roll out on your ThermoMat, with some plain flour on both sides of the dough.

IMG_4370

Now you can make up your pizza as usual, cook & enjoy!

Pizza Night (with lots of veggies)!

IMG_2404-002

It might not sound like a stretch to get your kids to like pizza, but my 5yo daughter is a very fussy, plain eater. Even to the point where she would turn up her nose at a slice of pizza, just because it was something different. Although she’s getting better, she’s still very fussy, although now she’ll try something, before telling me she doesn’t like it….. sometimes!

Anyway, she now loves pizza, so that is one new thing she likes, although she can still spot the smallest vegetable in her dinner, so I’m getting very creative at hiding them. This pizza I made for dinner this week was very easy (almost everything I grabbed from the freezer), very tasty & most importantly, FULL OF VEGGIES!

The sauce on this pizza is a few cubes of mashed vegetables, which I have in the freezer.  Then I mix in a few teaspoons of tomato paste, to give it a pizza sauce colour.   Follow this link to the veggie mash recipe.  I made the beef meatballs in my Thermomix too, although I haven’t posted the recipe yet.  They too are full of veggies, that are pureed so fine that my 5yo can’t spot them & then steamed in my Varoma tray.  I’ve then sprinkled on some cheese & cooked.

Freezing Pizza Dough:

The pizza dough recipe in your basic or everyday cookbook makes 4 pizza bases.  After the dough has been proved, it’s fine to freeze the dough if you’re not using the whole amount.  I freeze my dough in portions, wrapped in glad wrap.

IMG_4367

If you want to make frozen dough into a pizza, allow a few hours for it to defrost & come to room temperature.  I’ll usually put mine out in the morning or at lunchtime.  Unwrap the frozen dough & put on a plate.  Place fresh glad wrap over the frozen dough, making sure that it’s airtight.

IMG_4369

Now just allow your dough to slowly defrost.  As it comes to room temperature, it will prove again, doubling in size, which is why you place fresh glad wrap over it.  The dough will be quite sticky, so it’s good to roll out on your ThermoMat, with some plain flour on both sides of the dough.

IMG_4370

More Pizza Tips:

Another way to make sure you can always whip up a quick pizza for dinner (without having to go to the shops) is to have some toppings in the freezer.  I recently bought a boned leg of ham at the supermarket that was on sale, shredded it in my Thermomix & then frozen in 90g portions.  Not only is this convenient, it can save you a lot of money.

Pizza night

This is enough ham for one pizza & here’s what I made for the kids – they demolished it:

Pizza night 2

CADA (Fresh Muesli)

Cada

This post is for all of my TM5 customers.   When the new Thermomix model was released in September 2014, the Everyday Cookbook that came with your Thermomix, was replaced with The Basic Cookbook.  The Basic Cookbook is wonderful & interestingly, wherever in the world you buy your TM5, you receive the same cookbook (just in different languages).    The only down side is that CADA isn’t in the cookbook!  CADA is an acronym for the four ingredients – Coconut, Almonds, Dates & Apple.

You literally cannot make a quicker, easier, healthier breakfast.  This takes less than a minute to throw the ingredients in your TM bowl & then 2 seconds to chop.  Substitute the almonds & dates for other dried fruit & nuts if you want.  You can even serve this with custard for a dessert feel.

To my TM5 customers & my future TM5 customers; do yourself a favour & make CADA at least once!

Ingredients:
40g fresh coconut (flesh only) or desiccated coconut
40g almonds
40g pitted dates
1 apple, quartered

Method:
1) Place all ingredients into TM bowl, chop Turbo/1 second/ 2 times.
2) Serve with yoghurt straight away, or refrigerate until ready to serve.

Source: Thermomix Everyday Cookbook
Photo Source: Thermomix Recipe Community