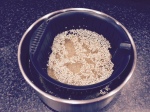
Broccoli Salad with Craisins & Almonds

Broccoli Salad

One of my lovely colleagues at Thermomix passed on this amazing salad recipe – thanks Melinda!  I made this salad at home recently, to serve with a piece of steak & also made it at a demo, to rave reviews.   This salad is full of flavour & colour, but like so many Thermomix recipes, is so very easy.    This salad is especially delicious when you make your own Mayonnaise in your Thermomix.

This recipe is actually based on the Broccoli Salad from the Everyday Cookbook & Janine Babauskis modified the recipe as it is today.  Janine used to work for Thermomix & there is not much she doesn’t know about her Thermomix.  She also presents many of the cooking classes at the Alyce Alexandra cooking school in South Melbourne.  If you receive a Thermomix owners newsletter from me, you’ll know I’m a huge fan of Alyce Alexandra & their classes.   By going along to any class, you’ll pick up so many tips from Janine, not just about your Thermomix, but cooking in general.

Ingredients:
180g broccoli florets, roughly chopped (about 3/4 head)
1 carrot, roughly chopped
1 green apple, quartered
1/4 red onion
1 stick celery, roughly chopped
1 red capsicum, seeds removed & roughly chopped
1 handful of craisins
100g slivered almonds (toasted)

Dressing Ingredients:
100g Mayonnaise (homemade or good quality)
10-15g pomegranate syrup
1/4 tsp salt or to taste

Method:
1) Add broccoli, carrot, apple, onion, celery & capsicum to TM bowl, chop 4 seconds/speed 4.5
2) Scrape down the sides of the bowl & repeat chopping for 1 second at a time/speed 4.5, until desired consistency is reached.
3) Add craisins, almonds, mayo, syrup & salt, stir 5 seconds/reverse/speed 3, or until combined.
4) Taste & add extra syrup or salt if required.

 Notes:

 If you’re making your own mayonnaise in your Thermomix, make it first & scrape out the mayo into a jar or bowl.  You won’t need to clean the bowl, just add the salad ingredients & start the recipe.  I’ll usually have my TM spatula handy, in case I need to mix the salad through the lid.
 
 Feel free to add ingredients to your mayonnaise – the recipe in your cookbook is a basic mayo.  You can add things like garlic, parmesan or apple cider vinegar for a different flavour. 

Super Summer Salad

Brown Rice Salad4

I recently had the pleasure of seeing this version of the Brown Rice Salad being made by my Group Leader at one of our cooking classes.  I have to say, I was so impressed, that I made sure I shared the recipe on my blog.  I’ve had a Thermomix for 5 years now & had never made this recipe from the Everyday Cookbook or the Basic Cookbook.  It wasn’t until I saw it being made & then tasted it, that I realised what an amazing dish this is.   The salad is vegetarian & vegan without feta (which is optional).  The quantity in this recipe would feed at least 8 adults.  I personally usually halve the recipe when I make it & still have enough for a few lunches or dinners, as it keeps in the fridge for up to 5 days.

Cooked in layers, using the Varoma, the recipe also incorporates some new steaming techniques using baking paper.  By creating a platform on the base of the Varoma dish with two forks, you can pack the dish with parcels of food.  This allows you to cook each vegetable to it’s perfect cooking time – cook beetroot the longest & add the lighter veggies for the last 5-6 minutes.  This technique also prevents different foods ‘bleeding’ into each other during the cooking.  See the notes for more details & photo’s!

Thanks for sharing this lovely version of the recipe Michelle Moss!

Ingredients:
300g brown rice
100g quinoa
100g roasted cashews
50g sunflower seeds
50g pumpkin seeds (pepitas)
1 large beetroot, diced
2 bunches asparagus, cut into 1 inch pieces
1-2 red capsicum, sliced
120g baby spinach
4 spring onions
100g feta (optional)
60g olive oil
60g lemon juice
60g soy sauce or tamari

Method:
1)Weigh brown rice & quinoa into the simmering basket. Cover with cold water & soak for at least 1 hour (or up to 24 hours).
2) Insert the simmering basket (containing rice & quinoa) into TM bowl & add 900g water. Cook 15 minutes/Varoma/speed3.
3) Meanwhile, prepare vegetables for cooking by wrapping them in parcels of baking paper (see photo’s in Notes)
4) Place 2 forks or chopsticks on the base of the Varoma dish (see photo’s in Notes), then place the parcel of beetroot on top of forks.  Insert Varoma, cook 12 minutes/Varoma/speed3.
5) Add the asparagus & capsicum parcels to the Varoma dish, cook 6 minutes/Varoma/speed3.
6) Remove the Varoma dish & carefully check that vegetables are cooked to your liking.
7) Place spinach leaves in a large salad bowl.
8) Remove the simmering basket & pour cooked rice/quinoa over the leaves. Add cooked vegetables, nuts, seeds & spring onions. Gently toss to combine.
9) To make the dressing, combine oil, lemon juice & soy sauce in a small jar.   Shake well, pour over salad & toss to combine. Top with crumbled feta.
Season with salt & pepper.  Serve warm or cold.

Notes:

forks in Varoma

Placing 2 forks or chopsticks in the base of your Varoma dish, creates a platform that allows steam into the Varoma, so you can pack your dish full of food.

Brown Rice Salad3

For this recipe, the parcel of beetroot does in the Varoma dish first, as it takes the longest to cook.

Brown Rice Salad2

Add additional parcels of vegetables according to the cooking time they require.

Brown Rice Salad1

Pouring the cooked rice & quinoa over the baby spinach wilt’s the leaves

Brown Rice Salad

I add all the ingredients for the dressing in a jar & shake well.  You can pour it all over the salad, or keep some for the leftovers.  The dressing could also be mixed in your TM bowl on speed 6 for 5 seconds.

Brown Rice Salad5

When soaking the rice & quinoa, the basket fits into a Thermo Server.

Moroccan Carrot Salad

IMG_4378

This is one of my favourite salads & my whole family make if on a regular basis.  I’ve made it at a few Thermomix demonstrations & I’m always asked if this is on my blog.  The flavours are lovely & personally I think the currants really make this dish.  Every time I take this salad to a BBQ, without fail, someone always asks me for the recipe.  Everyone always asks how I chopped the carrots so fine & of course that’s when I start raving on about my Thermomix!

Ingredients:
Small handful mint leaves
Small handful parsley
3 Large carrots, roughly chopped
1 tspn coriander powder
1 tspn cumin powder
2 tbsp currants
30g Olive oil
Juice of 1 lemon
Sea salt & black pepper to taste

Method:

1) Place mint & parsley into TM bowl & chop for 5 seconds on speed 7.
2) Add carrots & dry spices & chop for 3 seconds on speed 5.
3) Check the size of the carrots & chop for another 1-2 seconds on speed 5. Be careful not to over chop.
4) Add remaining ingredients & mix 5 seconds/reverse/speed 3.

Notes:

The key with this salad is not to over chop.  If you chop on any speed over 5, you will literally end up with carrot juice.  It’s best to only chop for a few seconds & then chop for a second or two more if necessary.

Source: A Taste of Vegetarian – Thermomix

Currant & Cashew Brown Rice Salad

IMG_5048

This is a very versatile & tasty salad, that can be served for dinner alongside a piece of steak or a chicken breast, or impress your friends by taking this to a BBQ.  Brown rice is so easy to cook in the Thermomix & can be cooked up to a day in advance to save time on the day.  This will last a few days in the fridge, even once it’s been dressed, so keep the left overs for lunch.  The best thing is you can add anything to this salad, whatever you have in the fridge or pantry.  The only things I recommend not to leave out are the currants – they give the salad a lovely sweetness with every mouthful & diced celery gives it a lovely crunch.

Ingredients:
300-400g Brown Rice (uncooked)
2 handfuls raw cashews
3-4 tbsp currants
1 carrot
3 spring onions
1 small can corn kernels (drained)
2 stalks celery

Dressing:
Juice of 2 lemons
30g olive oil
50g soy sauce
salt & pepper

Method:
1) place 1.2 Litres water in TM bowl. Insert rice basket, zero scales & weigh rice.
2) Cook 35 minutes/Varoma temperature/speed 4
3) Use spatula to remove rice basket & tip rice into serving bowl. Place in the fridge to cool.
4) Add all other finely chopped ingredients to cooled rice. Place dressing ingredients in a small bowl or cup. Stir to combine & pour over salad. Toss salad so all rice is evenly coated in dressing.

Notes:

You can add anything to this salad – Capsicum, baby spinach, mushrooms, coriander, mint or shredded chicken.   You can even add to the dressing –  honey, ginger, lime or garlic.

I chose to hand chop ingredients for this, as it’s nice to have the same shape for all ingredients that are not too small.   You can chop in your Thermomix if you prefer.

Chicken & Pumpkin Quinoa Salad with Tangy Maple Dressing

IMG_4889

I follow a number of Thermomix bloggers & ‘ThermOMG’ has posted a list of dishes that all Thermomix owners MUST make.  This salad is from Quirky Cooking & there are a few more of her dishes on the list.  I made this for dinner this week & as you can see from my photo it looks delicious!  My husband & I had it for dinner one night & then I ate it for lunch, 2 days in a row.  The beauty of this dish, is that you cook everything at once in layers, which saves time & energy.  I’ve added my own spin to the dressing, but you can really dress it with whatever you like.  I also drizzled over a little ‘Vino Cotto’ for extra flavour.  You can also add anything you like to the salad – smoked salmon, tuna, salmon, flaked trout, nuts, currants, seeds…..the list is endless!

Salad Ingredients:
250-300g Quinoa
800g boiling water
4 eggs
4 chicken thighs, cubed
250g pumpkin, chopped
few handfuls baby spinach
150g semi dried tomatoes
150g kalamata olives, pitted
100g feta
pine nuts or sesame seeds to garnish

Dressing Ingredients:
20g olive oil
10g balsamic vinegar
10g maple syrup
2 tsp seeded mustard
juice of 1 lemon
salt & pepper

Salad Method:

1) Weigh boiling water into TM bowl.  Insert rice basket, re-set scales & weigh Quinoa into basket.  Place eggs on top of Quinoa.

IMG_4886

2) Line the Varoma tray with baking paper & add chicken pieces.  Add pumpkin to the Varoma dish.

3) Place Lid on TM bowl & set Varoma into position.  Cook for 20 minutes/Varoma temperature/speed 4.  Check that the chicken is cooked & cook additional few minutes if required.

IMG_4887

4) Once cooked, carefully remove eggs from the rice basket using tongs (as they will be hot)!

IMG_4888

This is what the quinoa & eggs look like after cooking.

5) Place baby spinach leaves into a large salad bowl.   Add cooked chicken, pumpkin & quinoa.  Add all other ingredients, including peeled & quartered boiled eggs.

6) Pour dressing over salad ingredients & gently toss to combine.  I use disposable food handling gloves & gently toss the salad with my hands.  Garnish with pine nuts or sesame seeds.

Dressing Method:

Empty excess water from TM bowl, but do not wash it.  Add all ingredients to bowl & mix 6 seconds/speed 6.

Source: Quirky Cooking

Notes:

I always steam my meat on the Varoma tray, lined with a piece of baking paper.  The baking paper makes for very little washing up (everything just needs a rinse).

Cranberry Chicken Salad

chicken-salad-with-tarragon-520

This summer salad can be served so many ways – with some baby spinach & salad greens or pita bread as a main meal or as a filling for sandwiches & wraps.  Toss through some cooked quinoa, or replace the mayonnaise with natural yoghurt for a low calorie option.  I’ve frozen this in portions, so can add to a salad or wrap anytime for a quick lunch.

Ingredients:
500-600g chicken breasts, diced
1L boiling water
3 spring onions
1 celery stick
1 granny smith apple, quartered
80g dried cranberries
60g green seedless grapes (when in season)
130g toasted almonds
1 tsp curry powder
3 tbsp TM mayonnaise
salt & pepper to taste

Method:

1) Line Varoma tray with baking paper & place diced chicken on tray.  Add boiling water to TM bowl, set Varoma into place & cook for 15 minutes/Varoma temperature/speed 3.  Check the chicken is cooked & cook for a more minutes if required.

2) Set chicken aside to cool slightly.  Chicken can be cooked ahead of time & placed in the fridge.  Clean & dry TM bowl.

3) Place all ingredients, except chicken, in the TM bowl & chop for 4 seconds/speed 4.

4) Add cooked chicken & mix for 5 seconds/reverse/speed 3.

Notes:

Salad can be pre made & refrigerated up to 24 hours before serving.

Lining the varoma tray with baking paper when cooking chicken, means there is hardly anything to wash up!

Source: TM Meat on the Menu