Grating Tasty Cheese

Grated CheeseSome of my customers have asked me about grating cheese in their Thermomix, in particular cheeses like Tasty or Cheddar.  They find it easy to grate hard cheese like parmesan (10 seconds/speed 10), but struggle with softer cheeses.    They key is to not grate Tasty & Cheddar as long as hard cheeses, as the cheese will just clump together.  My other tip is to add some plain flour to your cheese before you grate & this will help your cheese not to clump.

You can save a lot of money buying blocks of cheese & grating them yourself.  A packet of pre packed grated cheese can cost around $17.50 per kilo, verses a block of cheese costing around $12.00 per kilo.  If your family eats a lot of cheese, these savings are significant over a year.  Not to mention avoiding additives & preservatives found in pre packaged grated cheese.  These contain Cellulose, which stops the grated cheese from clumping.  What many don’t know, is that Cellulose is actually powdered wood pulp!  I know what I’d prefer my kids not to be eating.

 Ingredients:
400 – 500g cheese, cut into pieces (approx. 4-5cm cubes)
40g plain flour

Method:
1) Place cheese & flour in TM bowl.  Chop 4 seconds/speed 8.  Check consistency & chop for an additional second at a time, so as not to over grate, until desired consistency reached.
2) Store in your fridge in an airtight container for up to a month, or in a zip lock bag in your freezer.

Garlic Confit

Garlic Confit3

If you love making pizza’s, this is a must have staple in your fridge.  Spread it on pizza dough, then top with sauce & toppings.  You can even just spread a teaspoon of this on the dough & top with grated cheese, for a delicious cheesy garlic pizza.  If you’re just making a garlic pizza or garlic bread, no need to drizzle with oil, as there’s enough oil in the spread already.  This is also wonderful to add to stir fry’s & any other dish you add garlic & oil.

Once the confit cools, the garlic pieces will solidify in the oil, so make sure you give it a good mix before you use.  This will keep in your fridge, in a sealed & sterilised jar for 3-6 months, making sure you always use a clean spoon in the jar.

I first made this last year, after converting the recipe to Thermomix method, from Pete Evan’s Pizza Cookbook (obviously before his Paleo days)!!  ‘Confit’ means cooking in fat or oil, at low temperature, for a long period of time.  Cooking garlic this way, means it’s cooked slowly into a rich, succulent texture & it brings out the sweetness of the garlic.  Even better, you should also avoid bad ‘garlic breath’ too!

Ingredients:
150g garlic cloves (about 3 bulbs)
250g olive oil

Method:
1) Place peeled garlic in TM bowl, chop 3 seconds/speed 5. Scrape down the sides of the bowl.
2) Add oil, cook 45 minutes/95°/reverse/speed 1.
3) Carefully pour into a sterilised jar & keep in the fridge.  One pizza will only need 1-2 teaspoons of mixture, spread over the base with the back of the spoon.


Notes:
 Once the confit has cooled, the garlic will solidify in the oil.  Make sure you give this a good mix before using, so you get an even amount of garlic & oil.

Garlic Confit Garlic Confit1

Chicken Stock Paste

IMG_1735

I’ve had my Thermomix for 4 years & in that time, I’ve always had vegetable stock concentrate in my fridge.  I use it in everything – basically I use 1 tablespoon, instead of using bought stock or stock powder/cubes.  Over time, it’s saved me a fortune on my grocery bills, but also adds incredible flavour to my cooking & of course I’m cooking with no additives or preservatives.

I recently bought the Quirky Cooking cookbook & as a Thermomix consultant, have been keen to make some of her recipes to endorse at demo’s & with my customers.  A few months ago I made Quirky’s version of Chicken Stock Paste.   I’ve found it really great having both vegetable & chicken stock paste in my fridge.   Although I love the vegetable stock, sometimes it’s nice to have chicken stock in some soups & dishes.  This paste lasts in the fridge for up to 2 months (it’s the salt that preserves it).  I usually freeze some of my stock paste for later use.  Given the amount of salt in the paste, it doesn’t freeze hard, but will extend the life of your paste.

Ingredients:
300g chicken thigh (skinless), cut into 4cm pieces
200g leek, white part only, cut into quarters
3 garlic cloves
2 carrots, cut into quarters
1 celery stalk, cut into quarters
1 onion, peeled & halved
1 dried bay leaf
1 whole clove or 1 pinch ground cloves
5 coriander seeds or 1/2 tsp ground coriander
50g white wine or 1 tbsp apple cider vinegar
150g course sea salt

Method:
1) Place chicken into TM bowl, mince by pressing Turbo button for 1 second, 3-4 times. (Place dial in closed lid position to use Turbo).
2) Add all vegetables & spices, chop 10 seconds/speed 5. Scrape down sides of TM bowl.
3) Add wine or vinegar & salt, mix 10 seconds/speed 5. Cook 25 minutes/Varoma temperature/speed 2 – MC removed – place TM basket on top of lid.

IMG_4827
4) Puree 1 minute/speed 9, gradually increasing speed to 9.

Store in the fridge for up to 2 months, or freeze in portions for later use.

To make liquid stock, use 1 – 2 tablespoons stock paste, per litre of water.

Source: Quirky Cooking

Cooking Rice

IMG_5128

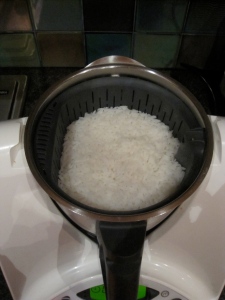
I’m often surprised how many people ask me about cooking rice in their Thermomix.   There have been a few different time/temperature/speed variations in the Everyday Cookbook over the years   I always cook rice in my Thermomix using the method outlined below with 100% success.  I used to have a rice cooker, but gave it to the op shop a few years ago!  Rice cooked in your Thermomix is perfectly cooked & fluffy every time.  Whether I’m cooking 100g or 400g of rice, I always use this method.  If you’re cooking rice to accompany a meal, the recommendation is to allow approximately 70g raw rice per person.  After a few goes, you will work out how many grams of rice to cook for your family meals (allowing for big eaters or kids) without having any wastage or not enough.

Cooking White Rice

up to 400g white rice
900g water

Method:
1) Place water in TM bowl.  Insert TM basket, zero scales & weigh desired amount of rice.
2) Cook 16/Varoma temperature/speed 4.

Note: If you’re cooking a large amount of rice (400g), you may need to cook for 20 minutes.  You can also go to speed 5 for the first 20-30 seconds, just so the water coats all of the rice.

Cooking Brown Rice

up to 400g brown rice
1200g water

Method:
1) Place water in TM bowl.  Insert TM basket, zero scales & weigh desired amount of rice.
2) Cook 35 minutes/Varoma temperature/speed 4.

Notes:

You can also rinse raw rice, once you’ve weighed it, to get off the excess starch.

Use the hook on your TM spatula to remove the rice basket after it’s been cooked, as it will be hot!

IMG_5129

Shredded Chicken

IMG_4384

Steaming chicken breasts in the Varoma is so easy & so is shredding the cooked chicken in your TM bowl. I always have shredded chicken in my freezer, frozen in 100g portions, that I defrost for adding to salads, wraps & sandwiches.

Before Thermomix, I worked for Peter Rowland Catering. PR is famous for his chicken sandwiches. I made some for a party a few years ago (of course they were a massive hit), but I poached the chicken for 30 minutes, plunged the breasts into cold water & then finely chopped the chicken. I then used a generous about of a ridiculously expensive mayonnaise & finally made my sandwiches. If only I had known back then, how do it my Thermomix!

Method:

1) Line Varoma tray with a sheet of baking paper.  This is not essential, however, doing this makes cleaning your Varoma a breeze.

2) Cut chicken breasts lengthwise into 4 strips & place on Varoma tray.

IMG_1071

3) Place 1000g boiling water in TM bowl & place lid & Varoma into position.

4) Cook for 15 minutes/Varoma temperature/speed 3.  Check to see chicken is cooked (may require a few more minutes cooking for larger quantities).

5) Remove chicken & cut strips in half.

6) Empty water from TM bowl (no need to wash) & place chicken in the bowl.

7) Mix 5 seconds/reverse/speed 3-4.  Repeat until desired consistency is achieved.

Tips for the perfect chicken sandwich:

Use home made mayonnaise made in your TM.  It will take 6 minutes to make!

Add some crunch – add chopped celery or pinenuts  to the chicken/mayo mixture.  You can even add a very light curry with mango!