Keeping herbs fresh

basil-bsp

I love using fresh herbs whenever I can in my cooking.  However, when I spend money on herbs & they only last a day or so, drives me crazy!

I wish I could take credit for this tip, but a colleague of mine shared this with me some time ago (thanks Petina!!).  I’ve been storing my fresh herbs like this ever since.  My herbs will easily last 7 days stored this way, even up to 10 days.

Here’s what to do…..

Take 2 pieces of paper towel & thoroughly well the towel with water, then give the towel a light squeeze.

Wrap the herbs tightly in the wet towel, then store in an airtight container in the fridge.

herbs1

Herbs

Reheating your BBQ leftovers in the Varoma

BBQ Varoma

One of my all time pet hates is wasting food, so we all enjoy leftovers in our house.   A friend of mine only recently told me about reheating food from last night’s BBQ in the Varoma, so I gave it a go the other night.   By reheating with steam, you retain the moisture in the food & I was very impressed with the result.  Needless to say, I won’t be using my microwave anymore to reheat things like cooked sausages or hamburgers.   One of the many things I love about Thermomix, is that after 5 years, I’m still picking up new hints & tips!

I reheated a sausage, a hamburger, a few Cajun chicken tenderloins & a few pieces of turkey stuffing.  I added 500g boiling water to the TM bowl & cooked for 7 minutes/Varoma/speed 3.  If you’re reheating a larger quantity of food, you may need to increase the time by a few minutes.

I always use a sheet of baking paper on my Varoma tray – purely so there is minimal washing up.  If you would rather not use baking paper, just place the food straight onto the Varoma tray.  I add boiling water from my kettle when I use my Varoma, as this decreases the overall heating time, as the boiling water will create steam faster than cold water.  If you do add cold or warm water to your TM bowl, allow 5-10 minutes extra heating time.

Cleaning your Thermomix

Here’s a few ways to clean your Thermomix bowl, along with a few tips for let’s say ‘spring cleaning’ once or twice a year.

For everyday cleaning, I can’t recommend highly enough, using a Thermomix bowl brush.   They are fantastic for getting around the bowl & blades quickly.  I think they’re so fantastic, I give one to my customers when I deliver their Thermomix.  If you want to buy some, they are $5 each & you should be able to get them from your consultant, or a local consultant in your area.  If not, you can purchase them through the Thermomix website http://www.thermomix.com.au/accessories-product-detail/?sku=1692 (note: this link is Thermomix in Australia).

Cleaning 1

Personally, when I’m cleaning my bowl, I really only ever remove the blades if I can see food stuck to the blades.  Having a small brush like this, or a baby’s bottle teat brush, is essential for cleaning your blades.  They are fantastic for making sure everything’s clean under the blades too.

cleaningI found these brushes on an Australian website, although anything similar would do the job just as well.

http://www.tm-essentials.com.au/p/2-x-thermomix-twisted-wire-double-ended-cleaning-b/TWISTEDBRUSH

Cleaning 2

VINEGAR CLEAN

A vinegar clean is great to do once, or twice a year.  I do a vinegar clean when the inside of my bowl has a slight rust colour tinge to it.  Doing the vinegar clean & then a good rinse & brush with the Thermomix bowl brush, will help your bowl shine.

Simply add 1 litre white vinegar to the TM bowl & 1 good squirt of dishwashing liquid.  Cook 60 minutes/50 degrees/speed 1.

GUMPTION

Cleaning3

Gumption is a gentle multi purpose cleanser, that I use with a gentle scouring sponge to remove any burnt stains on the bottom of the bowl.  You might find you get these if you cook something for a long time at high temperature that contains sugar or honey.

Cleaning7

If my bowl looks like this, I take out the blades & give it a good scrub with Gumption.  These are the types of scourers I use – just NEVER USE STEELO (steel wool)!

Cleaning4 Cleaning5

TARTARIC ACID

Cleaning3

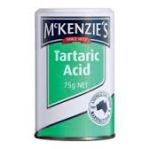
I haven’t used this personally, as I find vinegar clean & gumption wonderful for my cleaning.  However, my colleagues have recommended Tartaric Acid.   Simply sprinkle some into your Thermomix bowl & give a good wipe with a damp cloth.  Leave to sit for a few minutes, then rinse.

How to Double or Halve a Thermomix Recipe

To halve any Thermomix recipe, you halve the ingredients in the recipe & decrease the cooking time by 20%.

Before you do halve a recipe, consider making the full recipe & then freezing some portions – this will mean no cooking on another night!  Personally, the only recipe I ever make a half serve of is custard.  My kids prefer to eat it after it’s just cooled down, rather than when it’s been in the fridge overnight.  If there are other kids over, then I’ll make a full serve.


To double any Thermomix recipe, you double the ingredients in the recipe & increase the cooking time by 20%.

It’s important to keep an eye on the maximum level mark inside your TM bowl. This is either 2lt (TM31) or 2.2lt (TM5). Don’t overload your bowl with ingredients over these marks. If you do have a full bowl, when you’re chopping or cooking, you may need to use your TM Spatula through the hole in the lid, just to help the ingredients at the top of the bowl to be incorporated.

The majority of main dishes are designed to use the full capacity of the bowl, so you probably won’t be able to fit double ingredients in the bowl.  Most of the time, you would be able to just double the amount of protein in the recipe & if you do this, I’d still increase the cooking time by 20%.

Recipes such as soups, especially those that are pureed on the final step, are designed to use the full capacity of the bowl, so I would never double them.